Whew! It was a hit! A couple of months ago I mentioned that I was making a total of twelve aprons for some nieces, nephews and my kids for Christmas. Well, I pulled it off! I don't think I want to make another one for a while, but I did enjoy it at the time. Here's a little info about them in case you would like to make some of them yourself.
Mr. Froggy was my smallest apron. He was only 10"x 20". The ties were each 2 1/2"x 13", and the neck strap was 2 1/2" X 12. You can print out the froggy pattern here. I sewed the froggy by using a tight zig-zag stitch on my machine. The eyeballs and mouth were drawn on with a permanent marker.
 Mario and Luigi were simple and a lot of fun to make. Each apron was 28"x 17" (the seem allowances for all the aprons were 1/2"). The very top of the apron, at the neck, is about 8" wide. So you are going to slowly make a curve from the top down about 8" (you can use the side of a plate) to where the apron will be it's full 28" wide. From the 8" down is a straight line.
The ties were 2 1/2"x 14", and the neck strap was 2 1/2"x 15". Print out the Mario and Luigi patterns here. I did use iron-on stabilizer on the back of the pieces so they wouldn't bunch up when sewing them onto the aprons. The Mario and Luigi circles I sewed on using a tight zig-zag stitch, but the circles I used a normal stitch right up against the edges.
"Dora, Dora, Dora, the Explorer!" Isn't she precious?! She even already had on her cute Dora dress that Grandma had made for her. :0) You can find the complete pattern and instructions for this apron here where I dedicated a full post with detailed step-by-step instructions with photos.
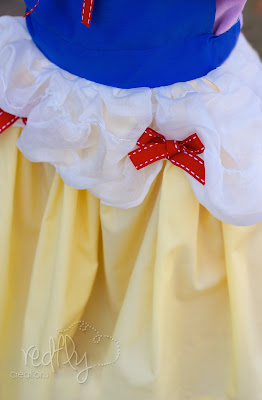
 Dora's big sister loves princesses, so her apron was Snow White. You can check out the instructions on how to make this one here.
Who doesn't love legos right now?! This apron has all the same dimensions of the Mario and Luigi aprons. You can download the lego template here. In case you are wondering, I drew the face on with a sharpie. :0)
 This cowgirl apron was pretty easy to make. I had leftover velvet from the Make a Skirt from a Man's Dress Shirt post, and decided that the fabric would go perfectly with the horse fabric I already owned. You can find the pattern and instructions here.
Basketball is all the rage in my 9 year-old's life right now. The dimensions of this apron are again the same as those of the Mario and Luigi. The basketball template can be downloaded here.
Mr. Super Man! Mr. Super Man was made a little smaller than the other boys' aprons. The full length was only 20" and the width was 15". The ties and neck straps were the same 2 1/2" x 14". The superman template is downloadable here.
Aaannnd .....Spidey! Spidey was a little different. I wanted to use both red and blue on the main part of the apron. Basically what I did was use the same dimensions as the Mario and Luigi, but then cut the red straight down about 4" from the end of the arm curve. Then I added a blue panel to each side. The straps were the typical 2 1/2" x 14", and the neck strap 2 1/2" x 15". The Spidey template is located here.
The Zebra apron at the top of the page was made for Brittany. The finished apron is 21"long. I made her apron in a triangular shape. The top is 9" wide and the very bottom is 25" wide. The ruffle is 4 1/2" wide and about 35" long, gathered to 25" long.
Oh! .... I also made a Batman apron that is not pictured here. The dimensions are the same as the Mario/ Luigi apron, and the template is here to download.
See? Making an apron isn't so hard! :0)
Have fun!!

{New to Redfly? Many more great ideas to come!}
Linked-Up here: Yesterday On Tuesday, Momnivores Dilemma, House Of Hepworths, Sew Much Ado, Easy Living Mom, Chic on a Shoestring Decorating, Finding Fabulous, Liz Marie Blog, Tidy Mom, Love and laundry, One Artsy Momma, Delightful Order, Five days Five ways, Truly Lovely Blog, Tatertots and Jello, Diana Rambles, Or So She Says


